Entry on behalf of Peter Taff
Upcycled Cot.pdf (289.4 KB)
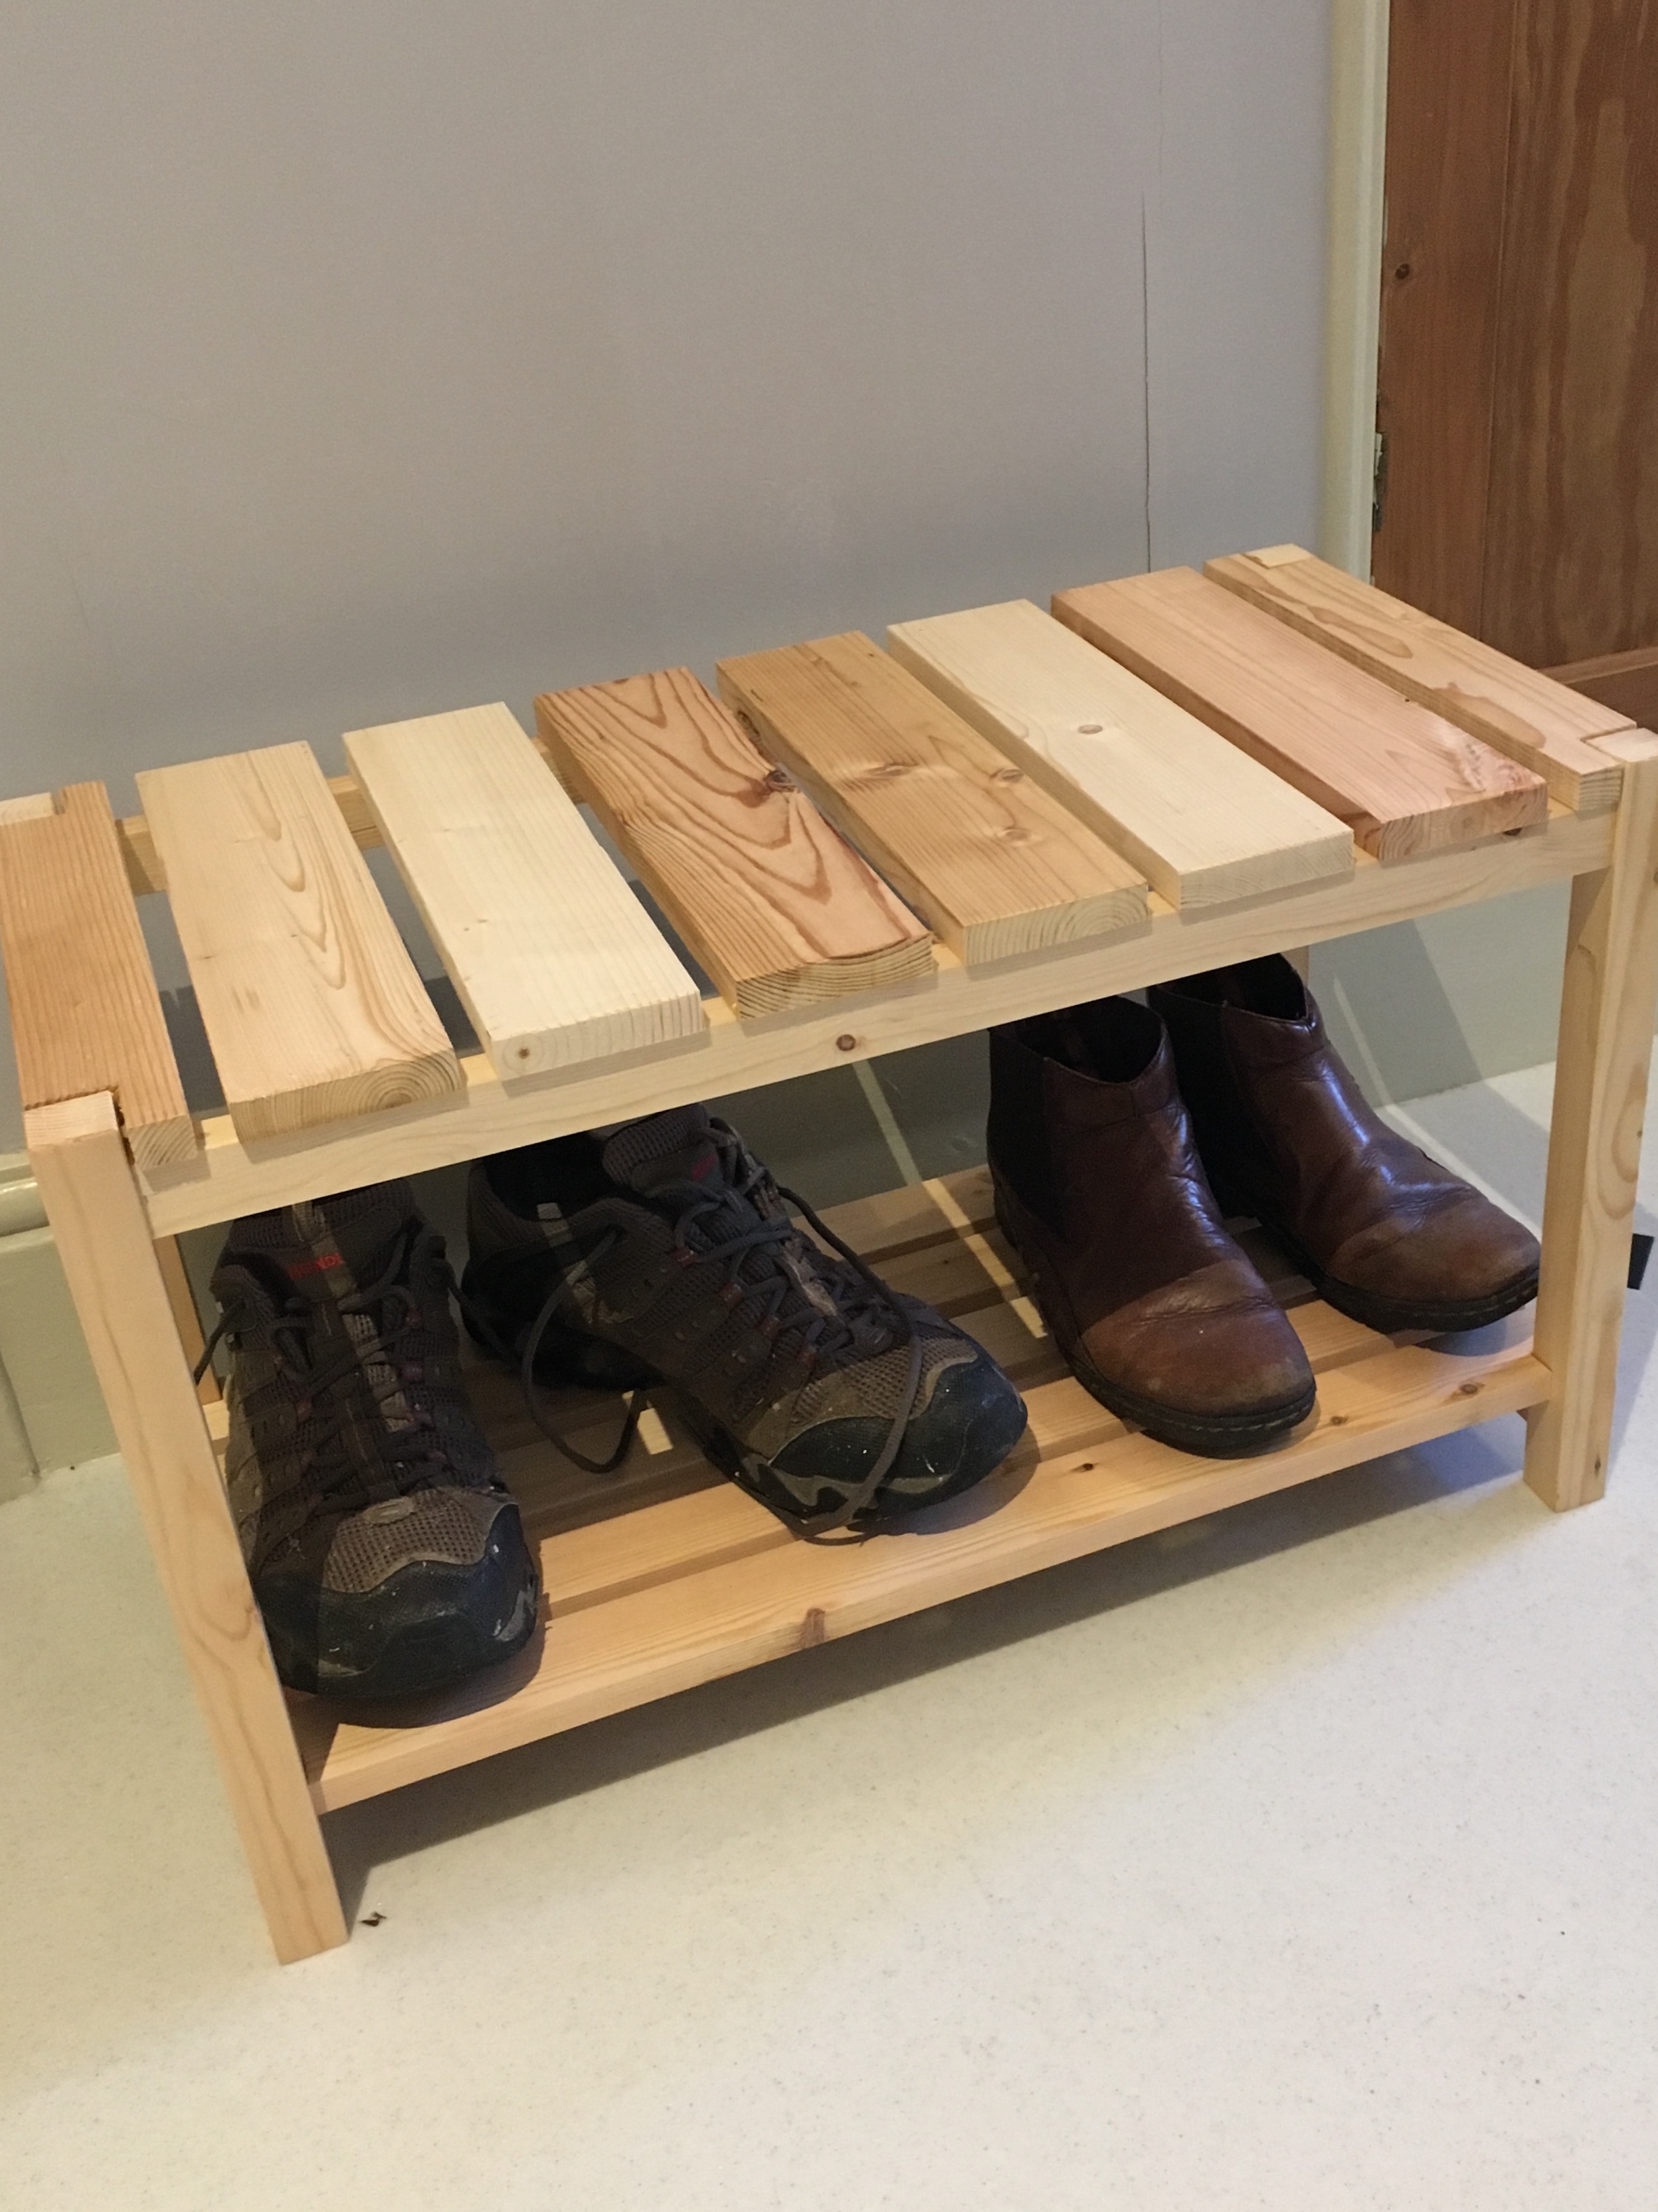
Hi, I know this is a simple project, but we needed a small shoe shelf to fit into a small space we have made (not the space shown in the photo!). I made it over the weekend from some waste wood - a mixture of old floorboards from a DIY project and other bits from my daughter’s house where I have been roped in to do DIY there as well! I think it does the job well and has gained me some useful brownie points!
Hi Tim, thanks very much! Here is a link to a build video I did for the table. Hope you enjoy!
Always good to see a video being made, but I was visibly wincing when I saw your left hand less than 50mm away from an unguarded table saw blade. I hear they’re quite good at replacing fingers these days…
I know, definitely not the wisest move! I broke the mount on the guard and was waiting on a replacement when the video was made…admittedly I should have waited but shop time is precious to me (not as precious as fingers I know  )
)
The problem here is that newcomers to wood mangling may think that this is the correct way to use a tablesaur and may copy what they see in the video…had you used some decent length push sticks it might have been slightly better. Clearly it’s very poor machine shop practice as old sweats with decades of experience and all their fingers will testify.
Since you’ve begun with the critiques …
No riving knife either. When the guard and riving knife are unavailable the correct technique is to not use the saw.
Employing a router by gripping it’s base with the finger an inch away from the whirring bit is also unwise. As is using a chisel with one’s other hand in front of it gripping the work piece.
Then there’s the construction. What is this gluing of the breadboard ends across the whole width of the piece? It will crack that piece if there’s any significant change in moisture. One glues only the middle bit (no more than four inches).
I’m off to watch the second half of the movie now, for more thrilling goings-on!
Is it wise to post how-tos when they are part how not-tos? Well, it’s one way to learn-by-mistake (watching someone else make them).
Apologies for any hurt feelings, which are nevertheless better than hurt bodies.
Hi @Lataxe_Ludd
Thanks for your comments. Don’t worry, no hurt feelings, I am by no means a professional when it comes to woodworking and any critique that is followed with advice is much appreciated. That’s why I joined this community after all.
The video was in no way meant as a ‘how to’, but simply as entertainment (clearly it’s had you entertained  )
)
I have taken onboard both yours and @Woodbloke comments and will use them to work safer, and hopefully produce better projects in the future.
Apparently we have to post twenty or more characters, but what I really wanted to say was …
I didn’t see the rest of the clip as I almost fainted with the tablesaur bit.
When I were a lad on Tyneside, 192 years ago, the streets were full of blokes with less than the full complement of fingers. Some lacked an arm. These were the days when health & safety were rudimentary.
Nevertheless, that vid is a good idea and informative … not just concerning the H&S.  It’s a good idea to speed it up a bit to quicken the demo, although one or two normal speed sections might be appropriate from time to time.
Personally I like a how-to, especially if there’s text that explains the nuances and the scope for error. I have to say, though, that 80% of my woodworking time is spent thinking about the design, thinking about the methods (especially the sequence of building) which I then make a mental note of on a piece of paper. The actual woodworking takes the rest of the time. I cheat and get the ladywife to do the finishing.
#MakeitinMarch
Shoe cabinet made out of 17 straight-ish pieces of hardwood. Found whilst clearing out a garage and wood might have been in there for at least 20 years. Finished off with marine high gloss paint.
It’s so important to really think your way through a project, because if you don’t, the project will end up as bandsaw fodder, which has happened to yours truly on more than one occasion. Of late, I’ve also started to model complicated areas of a project in 3D on a 1:1 scale, using old gash bits of pine, chipboard and mdf. It really does help me to see how something’s going to go together and of course there’s the obligatory full size or half scale working drawings. The best stuff I’ve found for this is wallpaper lining paper, which is available in your local friendly DIY shed in vast rolls.
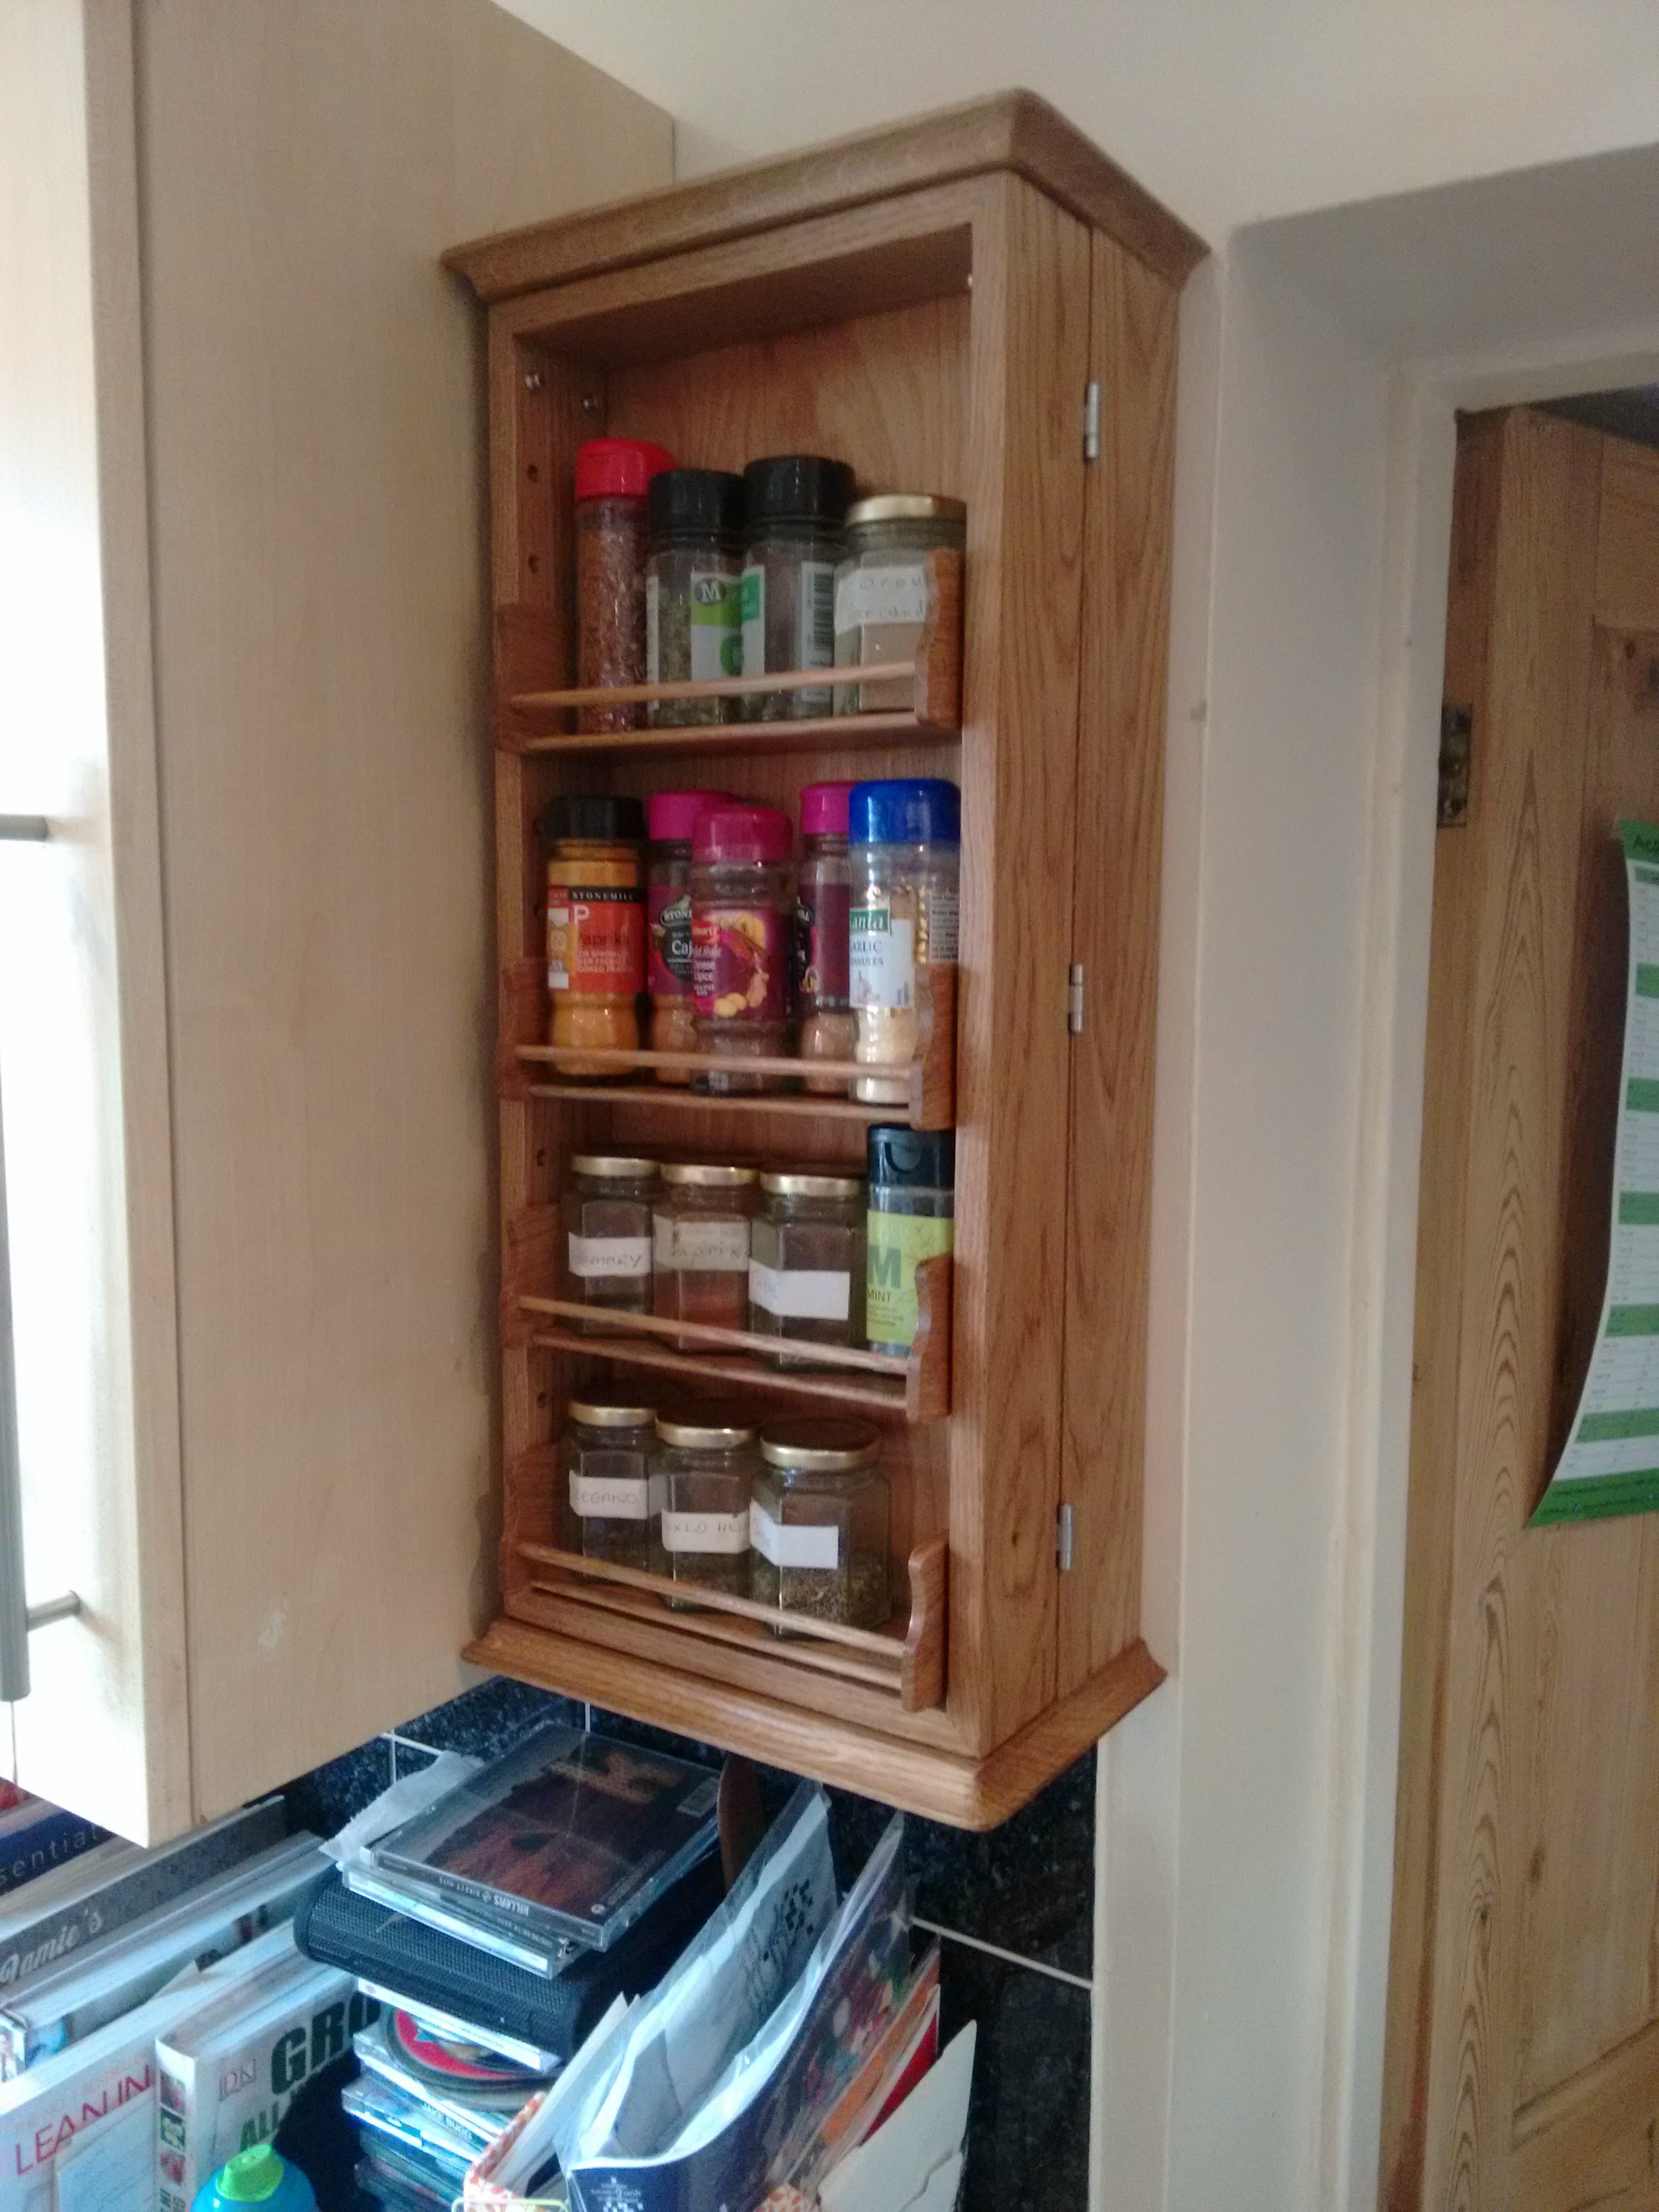
I was commisioned by the girlfriend to make a spice rack, she only wanted something simple, but I had other ideas! I used SketchUp to design it as I wanted something more personal, all the spice holders can be repositioned to accommodate different size bottles and jars, they slide over shelf pins and lock tight, a cupboard is hidden in the back for all those extra packets of spices that look messy. I used poly x hard wax oil satin and was very impressed with the finish.
Hi, a photo of my latest closed segmented vase which is made from white oak - spalted beech and purple heart. The vase is 300mm tall and finished with Osmo Hard Wax oil. Bets of luck to all entries.
Regards Chris Withall
I am over 16.